
Investing in premium genetics requires a baseline of respect for the plant. Whether you are cracking a fresh pack of Lucky Dog gear or popping a rare, aging pack, the first 72 hours dictate the entire trajectory of your harvest.
We do not believe in marketing hype or over-complicated gimmicks at Lucky Dog Seed Co. Genetics don’t lie, but a poor germination environment will kill a world-class seed before it ever gets a chance to speak.
While there are dozens of commercial germination methods on the market, a refined paper towel method remains the industry standard for serious home growers and commercial cultivators alike. It is clean, reliable, and keeps the variables exactly where you can see them.
Here is the exact protocol for popping your seeds, maximizing your success rate, and transitioning a healthy taproot safely into its first pot.
The Science of Germination: Why This Method Works
Cannabis seeds require a process called imbibition to wake up. This means the seed coat must absorb water to activate the internal enzymes responsible for growth.
The paper towel method is highly successful because it perfectly balances the water-to-oxygen ratio. When a paper towel is properly damp, it holds water via capillary action while leaving millions of microscopic air pockets open. This delivers the exact amount of moisture needed without suffocating the embryo.
Additionally, this method allows you to visually verify the viability of your seeds before investing time and space into potting mediums.
The Advanced Pre-Soak Secret: Water and Hydrogen Peroxide
Before placing your seeds into the paper towel, giving them a brief bath in a diluted hydrogen peroxide solution can dramatically increase your success rate, especially when working with older seeds or stubborn genetics.
Pro Tip for Older Seeds: If you are dealing with notoriously stubborn or heavily aged seeds, you can perform manual scarification before the pre-soak. Gently scuff the edges of the dry seed using a matchbox or a small piece of fine-grit sandpaper. This creates micro-abrasions in the tough outer shell, making it easier for the liquid solution to penetrate.
The Mechanics
Softens the Shell: Hydrogen peroxide (2H₂O₂) gently breaks down the tough outer coat of the seed, allowing moisture to penetrate the embryo efficiently.
Oxygen Surge: As the peroxide decomposes, it releases pure dissolved oxygen (O2
), stimulating early cellular metabolism. The scientifically accurate chemical reaction is:
2H₂O₂ → 2H₂O + O₂Pathogen Prevention: It sanitizes the seed surface, neutralizing airborne spores or latent fungi before they can cause damping-off disease.
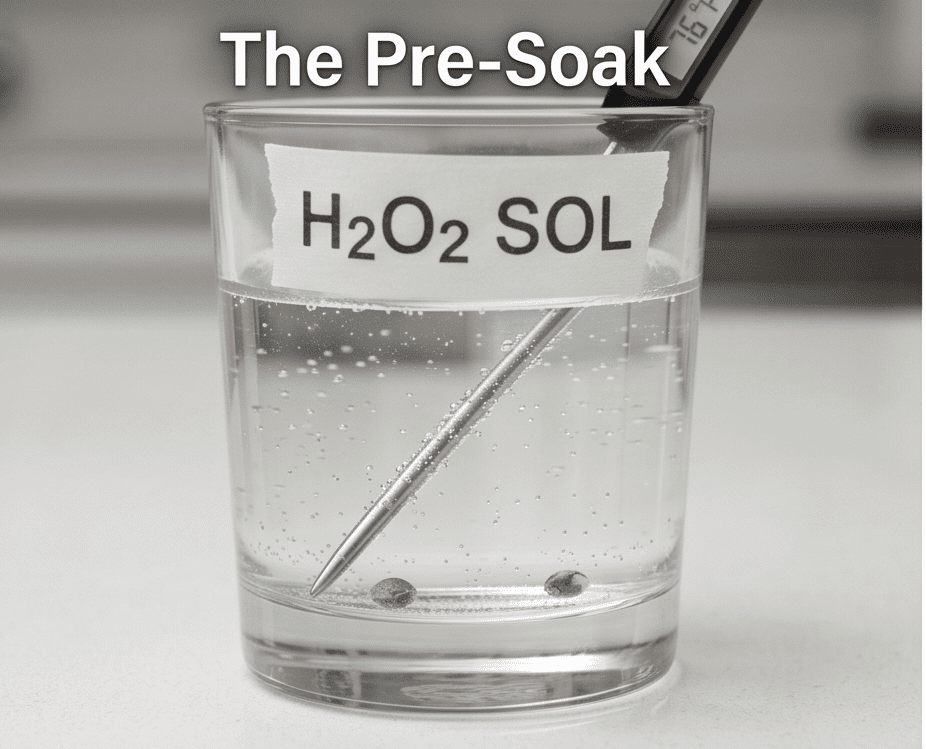
A 12 to 24-hour pre-soak in a diluted hydrogen peroxide solution jumpstarts the germination process.
The Protocol
The Mix: Add 1 teaspoon of standard 3% topical hydrogen peroxide (brown bottle from your pharmacy) to 1 cup of lukewarm distilled or reverse-osmosis (RO) water. (Avoid standard tap water, as chlorine can stunt sensitive embryonic root development).
The Bath: Drop your seeds into a clean glass with the solution. Store the glass in a warm, dark cupboard.
The Timeline & Flotation Test Warning: Let them soak for 12 to 24 hours max. While many viable seeds will sink to the bottom by the end of this window, do not throw away seeds that float. A common rookie mistake is assuming floating seeds are dead; in reality, perfectly healthy seeds often trap a tiny pocket of air inside the shell. Give them a gentle tap with a sanitized finger to break the surface tension, but even if they refuse to sink, proceed to the paper towel stage anyway. They will often germinate just fine. Never exceed the 24-hour limit, or you will drown the embryo.
Step-by-Step Paper Towel Germination
Once the pre-soak is complete, transition the seeds to a humid, dark environment to encourage rapid taproot extension.
Step 1: Prep and Sanitation
Cleanliness prevents damping-off. Wash your hands thoroughly, wear clean nitrile gloves, and sanitize your plates or workspace with rubbing alcohol.
Step 2: Choose the Medium
Use thick, plain, unbleached, and unprinted paper towels. Avoid cheap, scented, or heavily patterned options, the dyes and chemical residues can leach directly into a cracked seed.
Step 3: Establish Moisture Levels
Moisten two sheets of your paper towel using your remaining water-and-peroxide solution. Wring them out completely.
The Sponge Rule: The towels must feel damp like a wrung-out sponge, never dripping wet. Standing water pools kill seeds by starving them of oxygen.
Wring out the paper towels completely; they should feel damp like a sponge with zero pooling water.

Step 4: Spacing
Lay one damp towel flat on a clean ceramic plate. Use sanitized tweezers to place your seeds on the towel, ensuring at least one inch of breathing room between each one.
Step 5: Seal the Darkness
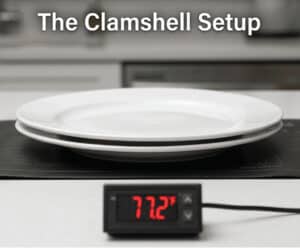
Cover the seeds with the second damp towel. Invert a second identical ceramic plate and place it over the first to create a dark, high-humidity clamshell dome. Roots naturally avoid light; total darkness is mandatory.
Step 6: Thermal Stability
Place the plates on a dedicated seedling heat mat equipped with a digital thermostat. Set the temperature to a stable 75°F to 78°F (24°C to 25.5°C). Fluctuating temperatures stall growth. Ensure your thermostat probe is placed directly underneath the bottom plate to read the actual surface temperature, not the ambient air room temperature.
Identifying the Optimal Cannabis Taproot Length
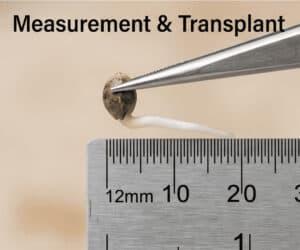
Measure the taproot carefully; the perfect window for transplanting is when the white tail reaches between 1/4 and 1/2 inch long.
Check your plates twice daily, minimizing the time the seeds are exposed to open air. You are looking for the shell to crack and a bright white cannabis taproot to emerge.
The ideal cannabis taproot length for transplanting is 1/4 to 1/2 inch (0.6 to 1.3 cm). Use these measurements to guide your timing:
Less than 1/4″ (Underdeveloped): Leave the seed in the paper towel; recheck in 12 hours.
1/4″ to 1/2″ (PERFECT TRANSPLANT WINDOW): Move the seed immediately to a starter pot or growing medium.
Greater than 1″ (Overdeveloped): High risk of root hair damage. The root may anchor into the towel. Treat with extreme care (see troubleshooting below).
Do not rush them if the shell has barely cracked, but do not leave them so long that they develop microscopic root hairs and anchor themselves directly into the paper towel fibers. Tearing an anchored root will permanently stunt or kill the plant.
Precision Transplanting
Moving a sprouted taproot requires careful execution. The root tip contains the apical meristem, the cellular engine driving your plant’s future root architecture.
The Medium: Fill a small starter pot or solo cup with a light, unfertilized seed-starting soil or clean coco coir. Create a hole exactly 1/2 inch deep using a sanitized tool.
Handling: Never touch the bare white root with your fingers. Use sterilized tweezers to gently hold the dark outer seed casing.
Orientation: Lower the seed into the hole with the white taproot pointing straight down toward the bottom of the cup.
The Cover: Brush loose soil over the opening. Do not pack or stamp the medium down; the sprout needs a loose, aerated path to push upward.
Hydration: Lightly mist the surface with a spray bottle to settle the medium. Avoid pouring water directly from a cup, which washes the seed too deep and cuts off oxygen.
Paper Towel Method Troubleshooting
The Towel Dried Out
If a seed cracks and dries out even briefly, the biological process stops permanently. Stay disciplined with your 12-hour checks.
The Root Embedded in the Towel
If a taproot grows into the paper towel fibers, do not rip it away. Use sanitized scissors to cut the small piece of paper out around the root and plant it directly into the soil. It will biodegrade naturally.
The Sprout Collapsed (Damping-Off)
This is caused by cold temperatures, stagnant air, or over-saturated soil. Keep your heat mat locked in and never flood your starter pots.
How to Fix “Helmet Head” (Seedling Stuck in Shell)
“Helmet Head” occurs when a seedling breaks through the soil surface but fails to naturally shed its tough outer seed casing, trapping the embryonic leaves (cotyledons) inside. If left untreated, the seedling cannot photosynthesize and will suffocate.
Place a single drop of lukewarm water directly onto the stuck shell to soften it.
Wait 15 to 20 minutes for the moisture to fully penetrate and loosen the casing.
Use a pair of sanitized tweezers to very gently slip the shell off. If you feel any physical resistance, stop immediately, apply more water, and give it more time. Never force it.
Cultivation Checklist
Pre-Soak Solution: 12–24 hours in a diluted water and 3% H₂O₂ mix (do not discard floaters).
Moisture Level: Damp like a wrung-out sponge (zero standing or pooling water).
Temperature Range: Locked consistently at 75°F to 78°F using a digital heat mat.
Lighting Conditions: 100% total darkness locked within a two-plate clamshell design.
Taproot Target Length: 1/4 to 1/2 inch long before moving to a medium.
Handling Rule: Handled exclusively by the seed shell using sanitized tweezers.
Cultivation FAQs
Does seed type change the germination process?
The biological mechanics of germination are identical across all cannabis seeds. However, management changes based on your project. If you are comparing feminized seeds vs. autoflower seeds, remember that autoflowers run on a strict internal clock and don’t have time to recover from transplant shock. Many cultivators choose to germinate autoflowers in a paper towel but transition them directly into their final, large pots to eliminate a second transplant later.
How long until the seedling breaks the surface?
Once the taproot is in the medium, expect the seedling to break the surface, shed its shell casing, and open its cotyledons (embryonic leaves) within 2 to 5 days.
Why did my seed crack but stop growing?
This is almost always a result of a sudden temperature drop, an over-saturated medium suffocating the roots, or physical damage to the taproot during the move from the towel to the pot. Keep your parameters stable and your hands off the root.
Since 1995, we’ve watched the culture evolve, but the fundamentals of good husbandry never change. Take your time, keep your environment dialed, and let the genetics do the rest.
For real updates from the garden, follow us on Instagram at @skunkva_v2 and @luckydogcannabisco_v2. Secure your next run directly at luckydogseedco.com